Lentil Tool Barrel Bead
Tutorial
|
|
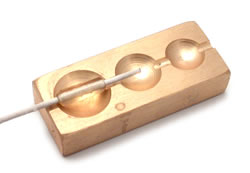
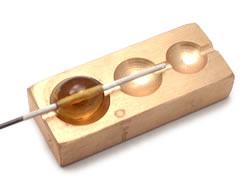
For this shape you do not need a base
however, you can use your tool while in the base without any interference
of the fence or side pin. The
bottom half of your lentil tool will be used as a form to roll your glass
in to achieve the final barrel shape. Using your stamps in this
way is a more freeform type of application and results will vary based
on the length of the initial footprint and the amount of glass you wind
onto your mandrel. Try it with all sizes of your lentil tools! |
|
| |
|
|
Lay down your initial footprint of glass. For this shape, any
footprint that fits inside the cavity you are using is fine. Ideally
you should start a little shy of the edges, maybe a millimeter on each
side. If you go outside the perimeter of the cavity you will have
rims at the end of your barrel. You
might find this is an effect you like but for this tutorial we are working
on the barrel shape.
|
| |
|
|
Apply glass onto your footprint and don't worry about the shape before
starting to roll in your lentil tool. Just try and make sure that
there is a symmetric amount of glass from the middle. That is,
if you have less near one end, make sure the other end is of equal proportion. You
might like the middle a little more plump. Play with it and see,
but make sure it is symmetrical for the barrel. Melt your
glass gently into a smooth form so there are no bumps like shown in the
picture. An olive or olive pit shape is good but a tube bead shape
also works.
|
| |
|
|
Here is the tricky part to describe in words. While your glass
is still soft enough to move, but not too molten that it will go way
out of shape, start to roll your glass in your lentil tool by turning
the mandrel away from you but using the resistance of the bottom of the
mold to shape the glass. The feeling is of rolling on a flat marver
but keeping the glass in one place rather than rolling along it.
The trick with this type of shaping
is to be gentle and let the weight of your glass do the work. If
you are a golfer you know to let the club do the work, not your arm muscles. Here,
let the weight of the glass do the work, do not press down into the tool.
|
| |
|
|
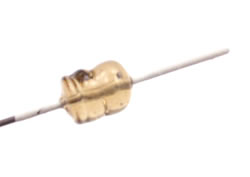
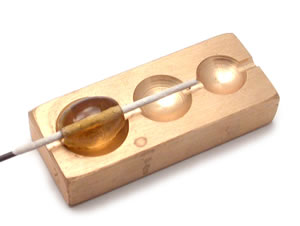
This motion will begin to shape your glass into a barrel and start
to provide puckered ends. As you do this you will need to reheat
and roll a few times. As you get better at it, that will need to
be done less and less. This picture shows how it begins to flatten
out more into a barrel from the olive shape.
If you see one side getting thinner than the other, rock your bead back
and forth and use the edges of the cavity to work them even. |
| |
|
|
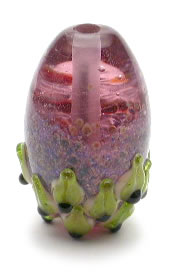
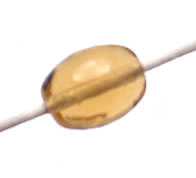
This is one example of the shape from the largest cavity of the lentil
trio tool. Different amounts of glass will give you different proportioned
barrels...longer and thinner, fatter and more round, etc.
The other cavities will yield other shapes because of their varying
depths and proportions. The smallest is great for helping you to
shape perfect rounds.
|
| |
|
|
| |
|